Laser engraving goes beyond just having the right equipment; it’s all about honing in on those little details that can really make a difference in your results. In this guide, we’ve compiled a set of practical engraving tips that have been tried and tested by real makers. Whether you’re just starting out or you’ve been at it for a while, these insights will help you achieve cleaner, deeper, and more consistent engravings.
1. Always Run a Material Test Before Engraving
Why It Matters:
Even materials that seem the same—like birch plywood from different suppliers—can behave quite differently when exposed to a laser. This is often due to differences in moisture content, adhesives, or grain density. To ensure consistent, high-quality results, it's a good idea to run a power/speed test matrix before starting each job.
Tips:
- To get the best results, use a “Material Test Grid” in LightBurn or similar software. This approach allows you to methodically assess how different materials react to various settings, helping you avoid the guesswork that often leads to wasting materials.
- Experiment with a range of power settings (10–100%) and speeds (100–3000 mm/min). Even materials that seem identical can behave differently when burned or engraved, thanks to factors like moisture content, adhesives, or grain density.
- Conduct tests both with and without Air Assist to see how it affects your results. While Air Assist can enhance edge clarity during cutting, it might also blur fine details when engraving. Testing both scenarios will help you achieve the best results for each material.
- Make sure to save your settings for each batch of material for future use. Different batches of the same material can perform differently, so keeping a record will help you maintain consistent quality without needing to retest every time.
2. Use Masking Tape to Prevent Burnt or Yellowed Edges
Why It Works:
Masking tape acts as a sacrificial layer that absorbs smoke, heat, and resin, preventing stains and char marks from forming on wood or acrylic surfaces.
Step-by-Step:
- Start by applying painter’s tape evenly over the engraving area. This tape serves as a protective layer, soaking up smoke, heat, and resin, so they don’t leave any stains or scorch marks on the material’s surface.
- Once you’re done with the engraving, peel off the tape. This step will lift away any residue, giving you clean, sharp edges without the hassle of heavy sanding.
- If you notice any small marks left behind, grab some 320–600 grit sandpaper and gently sand the surface. This fine sanding will help eliminate any faint discoloration that might have slipped through the tape, all while preserving the intricate details of your engraving.
Important Notes:
Tape Quality Matters: Using low-quality masking tape can lead to melting under the laser or leave behind a sticky mess. For the best results, always opt for high-temperature, residue-free painter’s tape or laser-safe masking paper.
Power Testing for Detail Work: When it comes to delicate engravings, not having enough laser power can result in the tape not cutting cleanly, which leaves those annoying ragged edges. Make sure to test and adjust the power so it cuts through the tape smoothly without burning the material underneath.
3. Turn Off Air Assist for Engraving, On for Cutting
What Happens:
Air Assist is designed to blow away smoke and debris, essential when cutting—but for engraving, especially grayscale images or fine text, too much airflow can scatter smoke and blur details.
Tips:
- When you're engraving, make sure to turn Air Assist off or dial it down to low pressure (under 10 PSI). While Air Assist does a great job of clearing away smoke and debris, too much airflow during engraving—especially with grayscale images or fine text—can end up scattering smoke and blurring those delicate details.
- On the other hand, when you're cutting, crank Air Assist up to full power (20–40 PSI). A strong airflow is crucial for cutting because it helps blow away debris, minimizes scorching, and ensures the laser cuts through the material smoothly and effectively.
Important Note:
While completely turning off Air Assist can help maintain detail, it’s not always the best option for every type of material. For materials that are prone to burning, like MDF or bamboo, disabling Air Assist entirely can lead to more smoke settling on the surface, which can create unsightly stains. In these situations, it’s better to lower the pressure to between 1–5 PSI instead of switching it off completely. This way, you can achieve cleaner results while still protecting the surface.
4. Pretreat Wood with Baking Soda or Titanium Dioxide
Why It Matters:
Applying a light coating of sodium bicarbonate (baking soda) or titanium dioxide (TiO₂) improves the chemical reaction during engraving, making lines darker and more defined.
Tips:
- To prepare your wood for engraving, mix 1 teaspoon of baking soda with 250 milliliters of water and spray it evenly over the surface. Let it dry completely. This simple step changes the wood's surface chemistry just enough to help the laser create darker burns and sharper lines.
- If you prefer, you can also use a TiO₂-based spray, which you can find at modeling or painting supply stores. Titanium dioxide works wonders with the laser beam, boosting contrast and making your engravings look richer and more defined.
- For the best results, consider combining this pretreatment with masking tape and finishing off with a clear coat. The tape will shield the surrounding areas from smoke stains, while the clear coat enhances the engraved color and seals the surface beautifully.
Important Notes:
- This technique shines when used on light-colored, soft woods like basswood and birch, but it might not work as well with every material. For instance, using it on bamboo or MDF could lead to some uneven scorching.
- Be aware that certain TiO₂ sprays might leave a white residue or have binders that can be tricky to clean off after engraving, which means you might need to do some extra tidying up.
5. Clean Optics & Realign the Laser Beam Regularly
Why It Matters:
Dirty lenses or misaligned mirrors can really mess with your laser's performance, causing the beam to distort and leading to blurry, shallow engravings. Even a tiny layer of dust, smoke, or resin can throw off the beam, resulting in inconsistent engraving depth and quality.
Tips:
- Weekly Cleaning: Gently wipe the lenses with at least 90% anhydrous isopropyl alcohol (IPA) and a microfiber cloth. Be careful with high-moisture alcohol, as it can leave water spots that might affect the beam quality.
- Gentle Handling: Use light, circular motions when cleaning—never press too hard on the lens surface, as that can scratch or damage the anti-reflective coating.
- Beam Alignment Checks: After moving your machine or swapping out lenses, always run a beam alignment test. Even a shift of just 1 mm can lead to uneven cuts or a loss of detail across your entire work area.
- For CO₂ Lasers: Make sure to inspect and clean all three mirrors along with the final focus lens. Just one dirty or misaligned component can impact the performance of the whole machine.
6. Choose the Right Laser Type for Your Materials
Not All Lasers Are Created Equal:
Understanding your laser’s capabilities is essential for safe, effective engraving.
|
Laser Type |
Strengths |
Limitations |
Ideal Materials |
|
Diode |
Budget-friendly, precise lines |
Low power (<15W), can’t cut clear acrylic |
Wood, paper, dark acrylic, leather |
|
CO₂ |
Versatile, strong output |
Can’t engrave bare metal directly |
Wood, acrylic, leather, rubber, fabric |
|
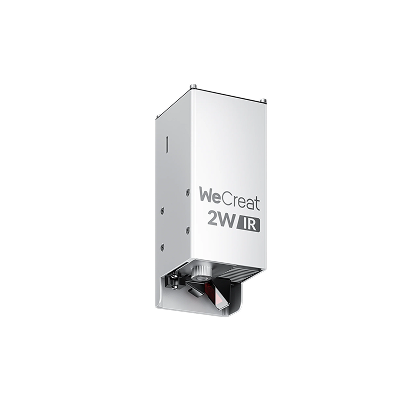
Fiber/IR |
Best for metal engraving |
Expensive, not for non-metals |
Stainless steel, aluminum, plastic tags |
7. Prevent Ghost Lines by Checking Travel Paths
Common Mistake:
Engraving software can mistakenly leave the laser on during travel movements, causing thin “ghost lines” or random marks across your material.
How to Fix It:
- To get the best results, make sure to enable the “Laser off during travel” option in your engraving software, like LightBurn. If the laser stays on while it’s moving from one point to another, it might leave behind faint ghost lines or unwanted marks on your material.
- Also, be sure to remove any non-engraving paths from the files you import. Hidden or stray vector lines can accidentally activate the laser, leading to random marks during travel.
- It’s a good idea to use separate layers for cutting, engraving, and vector scoring. By organizing your operations this way, you can ensure the laser only fires when you want it to, which helps prevent unintended burns and keeps your workflow running smoothly.
8. Correct Focus = Clean Engraving
Why Focus Matters:
If the laser is too far or too close to the surface, the beam won’t concentrate properly—resulting in blurry lines and shallow depth.
How to Focus:
- To get the best results, use a focus block or a material thickness gauge. Keeping the laser beam focused at its smallest point will help you achieve sharp lines and the right depth, avoiding any blurry or faint engravings.
- You can also raise or lower the material bed, or use a riser block if you're working with thicker materials. This adjustment helps maintain the right distance between the lens and the workpiece, which is super important when dealing with different material thicknesses.
- If you're using advanced machines, consider enabling Z-axis auto-focus or dynamic focus mode. These automated adjustments will help ensure that your engraving quality stays consistent, even on uneven surfaces or during multi-pass jobs.
9. Tweak Power & Speed to Avoid Burnt Edges When Cutting
Scenario:
Even if you’ve got the perfect settings down for one batch of material, a new supplier’s wood can act quite differently. Changes in glue type, resin content, or moisture levels can lead to excessive burning at the edges—messing up the finish and making you spend extra time sanding or refinishing.
Solution:
- If you find that a new batch of material is burning or charring even when you stick to your usual settings, it might be due to variations in glue content, moisture, or density that make it more sensitive to heat. To tackle this, try increasing the cutting speed or reducing the laser power. This adjustment can help manage heat buildup and prevent those pesky edge scorch marks.
- Another tip is to apply masking tape along the cut lines. This tape serves as a protective barrier, minimizing smoke staining and ensuring you get cleaner edges.
- It's also a good idea to run fresh tests for every new batch of material. Even minor changes in manufacturing can affect how the material responds to the laser, so re-testing is key to making sure your settings are spot on for consistent results.
- Lastly, make sure to save and label the best-performing settings for each batch. Keeping a record of these settings will save you from going through the trial-and-error process again in the future and will make it much easier to achieve high-quality cuts every time.10. Troubleshooting Summary Table
10. Quick Fix Guide for Common Issues
|
Problem |
Suggested Fixes |
|
Blurry or faded engravings |
Adjust focus, clean lenses, disable Air Assist |
|
Yellowed or smoky edges |
Use masking tape, reduce power, increase speed |
|
Engraving too shallow or low contrast |
Pretreat with baking soda or TiO₂ |
|
Poor cut quality or inconsistent burns |
Re-test settings per batch, verify correct laser type |
|
Random lines or marks |
Disable travel path burn, check file imports |
|
Material behavior varies per batch |
Run and document material tests for every supply |






Leave a comment
This site is protected by hCaptcha and the hCaptcha Privacy Policy and Terms of Service apply.